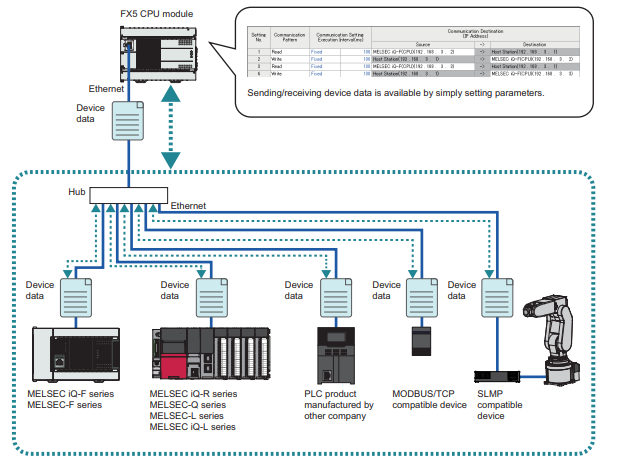
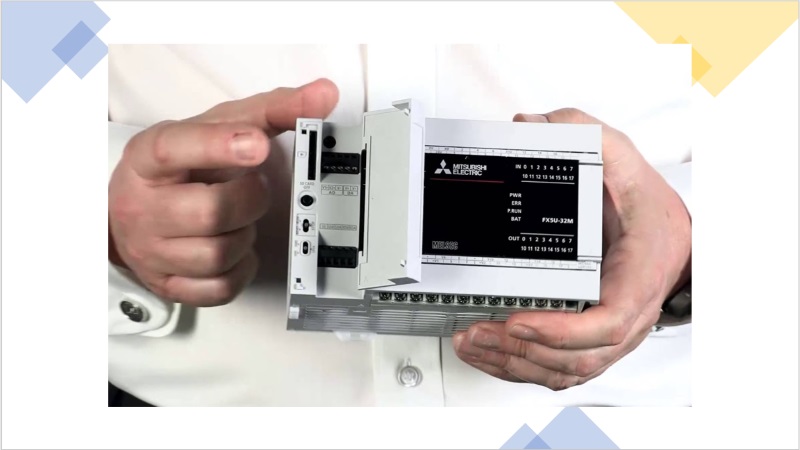
The Mitsubishi FX5U PLC, with its built-in Ethernet port, supports Simple PLC Communication, making it easy to connect with multiple devices such as other Mitsubishi PLCs or Modbus TCP-enabled controllers & other PLC like Omron, Siemens.
This guide will show you step-by-step how to configure Mitsubishi Simple PLC Communication in GX Works 3, enabling quick and stable PLC to PLC communication.
To learn How to drive a servo motor with FX5U plc you can also explore.
Why Use Mitsubishi Simple PLC Communication?
- Multiple device connection – Ideal for connecting several PLCs or Ethernet devices.
- Supports multiple protocols – Including Modbus TCP and Mitsubishi’s proprietary communication & other make PLC like Omron, Siemens.
- Easy setup – No advanced coding; just simple parameter configuration in GX Works 3.
- Read & Write operations – Exchange live data between PLCs with precision.
Step-by-Step Setup in GX Works 3
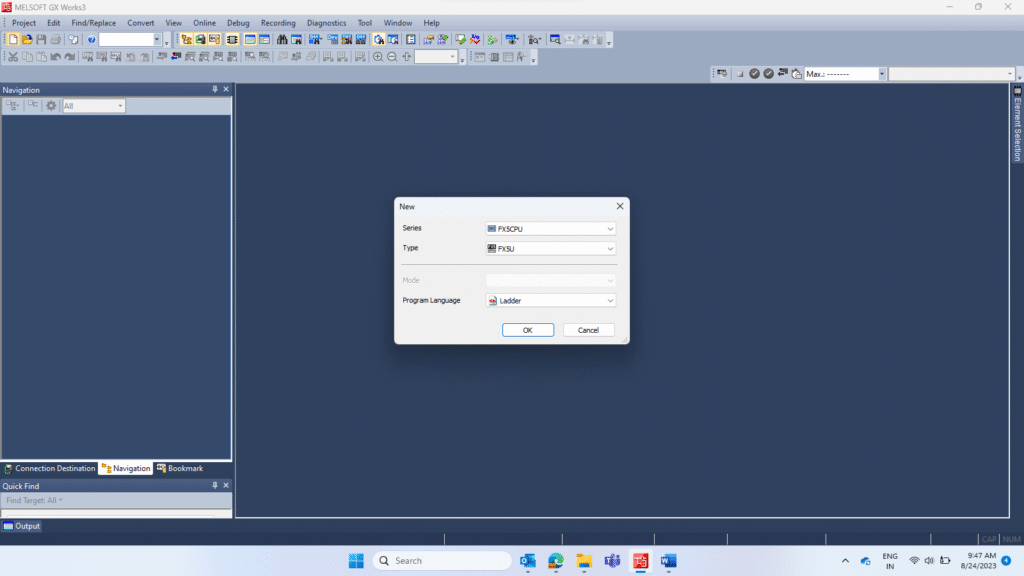
Step 1 – Create a New Project
- Open GX Works 3.
- Create a new project and select the correct Mitsubishi PLC model (e.g., FX5U).
- Click OK to proceed.
Step 2 – Configure Ethernet Port Settings
- Go to Module Parameters → Ethernet Port Setting.
- Set up the Ethernet port for your Mitsubishi PLC Communication requirements.
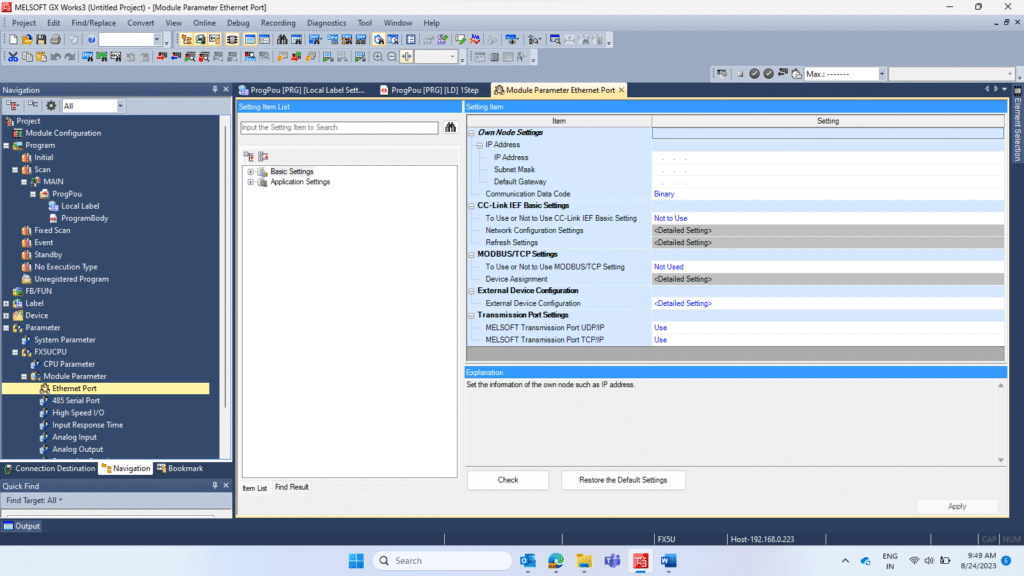
Step 3 – Enable Simple PLC Communication
- Under Application Settings, select Simple PLC Communication.
- Although there are several methods for Communication Between 2 PLC’s, This feature is perfect for quick PLC to PLC communication or integrating with Modbus TCP devices.

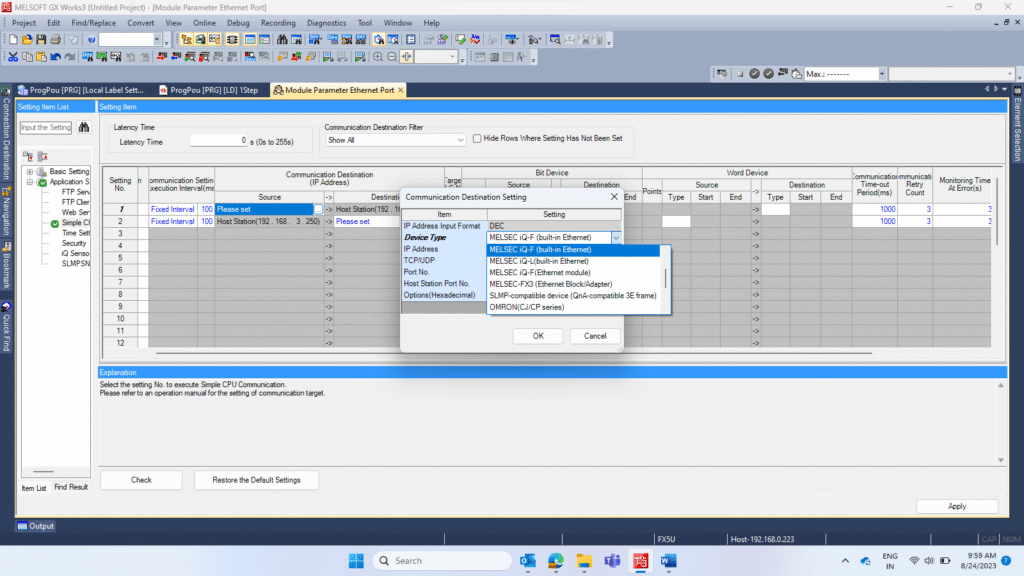
Step 4 – Detailed Settings
- Set “Use” for Simple PLC Communication.
- Click Detailed Setting and configure:
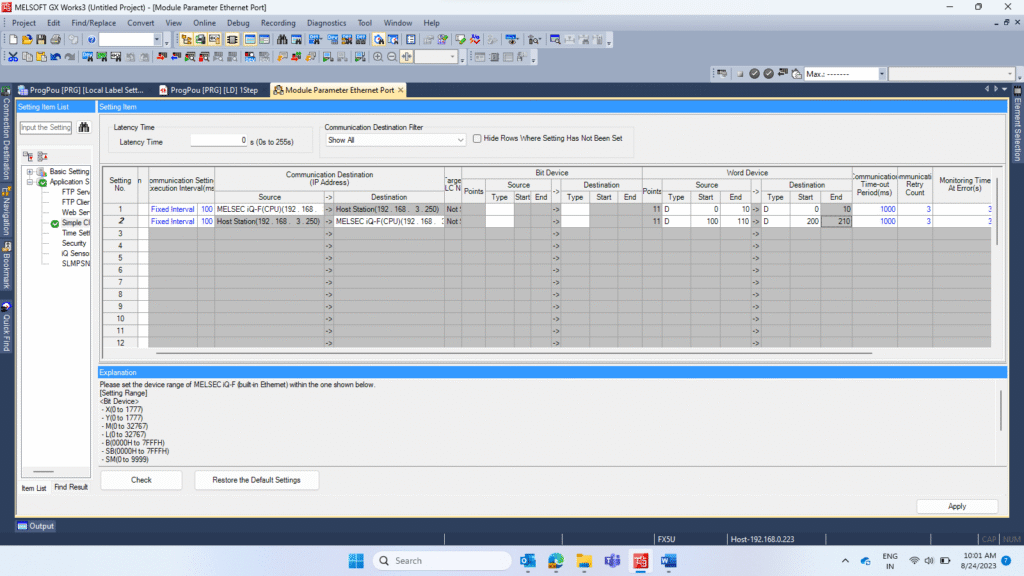
- IP addresses of the source and destination PLCs/devices
- Device type (Mitsubishi PLC, Modbus device, etc.)
- Data sharing words (registers to be exchanged)

Step 5 – Apply and Transfer to PLC
- Click Apply to save the settings.
- Transfer the program to the PLC to activate the communication setup.
Step 6 – Verify Data Transfer
- Open Device Monitoring in GX Works 3.
- Check:
- Sent and received data
- Communication status
- Any error codes
With Mitsubishi FX5U PLC Simple PLC Communication, setting up Ethernet-based communication is quick and reliable. Whether you need PLC to PLC communication or Modbus TCP integration, this method reduces complexity, speeds up deployment, and improves automation system performance.
By following these steps in GX Works 3, you can achieve a stable and efficient communication setup for your Mitsubishi PLC network. You can also download FX5U PLC communication manual from Mitsubishi Electric official website.
If you opt for the On Request option to initiate communication, in that case you will require to use below mentioned labels or buffer memory.
To enable communication on request in FX5U PLC, you’ll need to use the SD10350 and SD10351 system memory areas, which control communication settings.
- SD10350.b0 to SD10350.b15 represent communication start requests for Settings 1 to 16.
- SD10350.b0 to SD10351.b15 cover Settings 1 to 32 when working with extended communication options.
For example, when you turn ON bit SD10350.0, the FX5U PLC will initiate communication using Setting 1 as configured in the communication parameters. Each bit corresponds to a specific communication setting, allowing multiple communication channels to be controlled individually.
This method of on-demand communication in FX5U PLC is ideal for scenarios where constant communication isn’t required, helping to reduce network load and improve system efficiency.